
If you love your motorbike and hope to keep it with you for long, you need to check the battery life of your motorbike. Also, to avoid getting stuck in the middle of the road while you`re traveling to a distant place, it is important to do a little touch-up before taking your bike out. Or else you can also keep in check the maintenance of your bike and examine all necessary things.
Contents
Why is it necessary to replace a Motorcycle Battery?
Before getting a new motorbike, you should learn the basics, including changing a battery and maintaining the bike. When your motorcycle battery fails, and you don’t know, either you have to replace it or recharge it, then run a load test.
If your battery fails a load test, then replace a battery. A good battery will increase the life of your motorbike. If you fail to do so at the right time, you might end up needing to change parts that will become such a hassle and expensive.
Before getting a new battery to increase the shelf life of your bike, make sure that you`ve researched a little. Before making a purchase, check if that battery is long-lasting or not. If the battery is made up of good quality, it will decrease the workload on the engine.
If you are worried about replacing a battery, remain stress-free as this modern world has solutions to all such issues. You have to follow the simple steps, and at the end, you will see the results.
Process
Step 1. Read the Manual
People hold the misconception that good mechanics do not require the use of a manual book. Sure, there are times when a profession is so familiar that a book isn’t required, but in an ideal case, it is best to consult the manual. Therefore, purchase and read a manufacturer’s service manual to avoid any mistakes.
Step 2. Test and Clean the Batteries
Before changing the battery, take your motorcycle to a workshop and get the batteries tested. Suppose the batteries are in good health, then there is no need to replace them. However, it is also advised to check any corrosion on the cable connectors and clean so make sure the new batteries work efficiently.
Step 3. Find the Battery
Every motorcycle has its battery in different locations, which can easily be found through reading the manual. For example, batteries in Yamaha FJR1300 and Ducati Multistrada are present at the upper right fairing, and in FZ6 and Yamaha YZF-R6, they are present underneath the fuel tank.
So, to know the exact location of the battery, read the factory manual to save time looking for it. Also, some bikes have their batteries under the motorcycle seat and require a key to reach underneath by removing the seat.
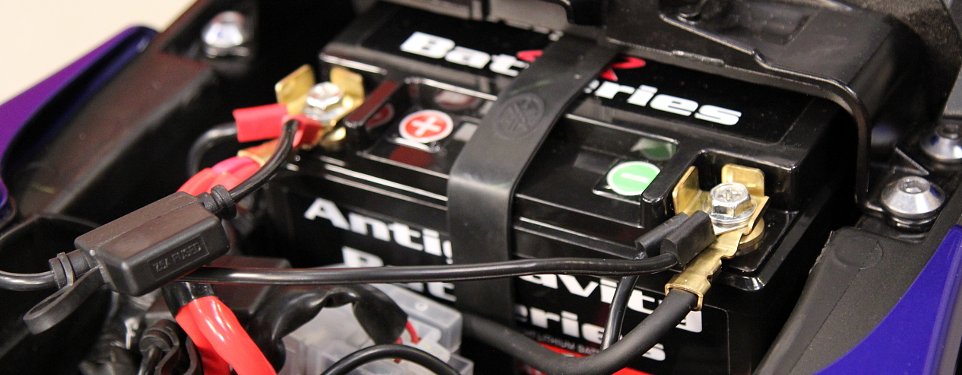
Step 4. Disconnecting the Negative Terminals
After identifying the battery’s position, make sure that you`ve disconnected the negative cable before removing the battery. If the positive side of the circuit is not connected to the ground, nothing negative will happen if you reverse the order. Because many bikes use the frame as a ground, any metal item near the positive terminal could act as a conductor.
Working on the negative side first helps to reduce the chances of grounding out the battery. After the negative cable is removed, nothing is affected if your removal tool bridges the space between the positive terminal and the frame on the battery.
If you don’t disconnect the negative side first and bridge the gap, it’ll probably explode. However, if you work on a bike that isn’t correctly fused, you risk causing a fire. Make sure the cable is tucked or taped out of the way, so it doesn’t come into contact with the battery terminal again. When the circuit is broken, you may remove the positive terminal.
Step 5. Remove the Battery
Remove the battery’s hold-downs. The battery could be held by a rubber strap, a shaped metal section, or some foam blocks. In any case, you’ll need to move them out of the way to take out the battery. When you’re removing the battery, keep in mind that most of the batteries contain “hollow” stations, and they might fall out.
Step 6. Install the New Battery
If you are using a new battery, do consider a perfect size that fits. Also, make sure the battery is of the appropriate power that the motorcycle requires. Finally, carefully observe the negative and positive terminals as they must not be reversed.
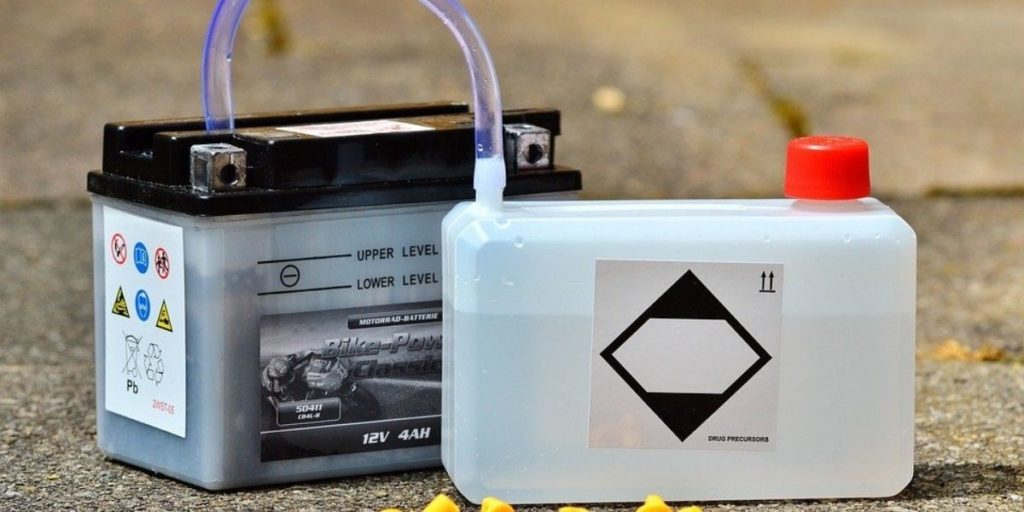
If you have to add acid to the battery, do it before placing the bike on the bike to prevent spillage. Moreover, it is also important to note that some batteries don’t include acid. If you have one of these, your best option is to take it to your local motorcycle shop and get it filled.
Furthermore, you must be aware that acid is typically supplied in far bigger quantities than you’ll need for a single battery. Therefore, it is advised to perform the task in a well-ventilated place since the byproducts produced are flammable and so make sure that the surrounding is safe for you.
Step 7. Could you test it?
To make sure you have power, turn the key on before putting everything back together. If you see lights, that’s fantastic! You may turn it off again. If you don’t, you’ll need to do some additional research. Make sure your connections are secure and that you’re using the proper terminals to avoid any inconvenience.
Types of Batteries
Absorbed Glass Mat (AGM) Batteries
Lead-acid batteries are also used in this sort of battery. On the other hand, the liquid is confined inside the battery between sheets of fiberglass in this case. So if the battery is pushed over on its side, it will prevent spilling out of the acid. These batteries are efficient and so are being used more as new conventional batteries.
Gel Cell Batteries
Gel cell batteries also include lead-acid in them. The acid in these batteries is in gel form due to the presence of silica. The gel form in batteries prevents them from spilling out.
Wet Cell Batteries
These batteries are also known as flooded cell, lead-acid batteries. They are the most often used type of motorbike battery. The rows of stoppers on the top of these batteries make them identifiable. These batteries can be refilled using distilled water. However, the liquid electrolyte inside can move freely, and so these conventional batteries might spill.
FAQs
When Do I Need to Replace My Battery?
When your motorcycle fails to start, you know it’s time for a new battery. When the battery is around 3-5 years old, you can replace it as a preventative step. This will offer you confidence that you will not become stranded when riding your motorcycle. Your engine should always start with a good battery.
What are some of the ways you can extend the life of your battery?
The life of your battery can be extended by keeping the battery’s charged. Following a maintenance routine that includes checking for corrosion and electrolyte levels is also an important step. Finally, make sure you’re using the right battery for your motorcycle if you do want to use the battery for long.
Why is it important to read the manual?
Every motorcycle has different locations of battery. Therefore, it is important to read the manual before changing the battery. Of course, some experts do not prefer to read the manual, but you should always be on the safe side. Therefore, reading the factory service manual before working is always a wise idea.
Is it easy to replace a motorcycle battery?
Every motorcycle owner should know how to do basic maintenance. A motorcycle, like any other vehicle, will require a new battery from time to time. When charging or putting the motorcycle away in storage, it’s important to remove the battery.
What is the average life of a motorcycle battery?
According to most manufacturers, a motorbike battery should last 48 months on average. Still, most of us are lucky if we get half that time, and most of the time, the battery’s premature demise may be attributed to a lack of care.
Final Verdict
While replacing a motorbike battery with the new one, make sure that the previous is fully damaged and will not work properly, and then the new battery has all the qualities that will be suitable for your bike.
You should also learn basic knowledge about bikes. Choose a battery that increases the life of your bike. The battery is a very important and basic element of the bike so choose it wisely. Read all the instructions on the manual card to easily fix a battery by following steps one by one easily.
Check the battery timing and choose the battery which can charge quickly so you won`t have to wait for several hours. The functioning of the battery depends on maintenance and storage. Battery needs appropriate temperature for storage, or else they will be damaged inside the storage space. It is highly recommended to change a battery so that your bike life increases and helps to improve your ride.