
Wrapping a motorcycle helmet is not a difficult job. The rider always chooses a helmet according to the color of the bike and the suit. A professional motorbike rider also knows how to wrap a helmet because they are meticulous about their helmets.
However, sometimes it could also be because there are many road accidents and sometimes a major shift in the weather conditions. You can also wrap a motorbike helmet of your own choice, or sometimes there is a special logo of your team printed on it.
The wrapping also helps to identify you as it covers your full face. You can always do this yourself if you`re thinking about saving a little. For such hassle, follow the simple steps for wrapping a helmet.
Process
Wrapping itself is a unique and very trendy process, which requires precision. However, to achieve the greater benefits, you are going to need some basic tools for wrapping and make sure to select the best quality paper for it.
A heat gun is used while wrapping. Most people prefer a vinyl wrap on their helmets. Wrapping also protects the frame of a helmet from scratch. If you are a bike lover, then you will also have some concerns about how to maintain the accessories while having fun with them.
Step1. Selecting a Good Quality Wrap
The quality of any material is an important step to consider. Usage of good quality material will allow you to keep a helmet for long. There are many options of wrap that you can choose as per your desire. Invest in good quality material so that you don’t involve yourself in unnecessary activities leading you to lose your precious time. It not only wastes time but also is a hassle. So for good results, look for fine quality.
The wrap you choose should not be hard to apply. Sometimes you need it while riding a motorcycle in a hurry, and you would not want to waste time fixing your wrap standing on the road. You would prefer a wrap that easily goes around your head without creating any frustration.
A good helmet has a good balance of flexibility and rigidity, allowing better handling of helmets. Helmets come in a variety of colors and designs, giving you many options. Wraps are very easy to customize according to your taste.
Furthermore, it also allows for detailed pictures to be imprinted on your helmet, which is one of its main advantages and makes it appealing to the eye. You can not only imprint pictures but can also get helmets that have your team logo on them or the logo of your favorite brand. And if you’re part of a race, then the racing number can also be imprinted.
Step 2. Preparing Workstation
If you want to wrap your motorbike helmet, you are going to need a clean workstation. Clear a tabletop so you have enough clear room to layout your equipment and materials. You’ll need to plug your heating tool into an electrical socket nearby. You’ll need enough light at your workplace to see any defects in the vinyl, such as wrinkles or air bubbles.
It is important to work on a clean station, as any dirt or debris that gets between the helmet and the vinyl will jeopardize the bond’s quality. The final product produced after working hard on this station will also show up as a bump.
It’s normally best to keep your workspace indoors because wind gusts might make it difficult to control the sheets of vinyl as you try to apply them. If you’re working outside, make sure you are away from fans that can cause the same problem and can become a hurdle in your work.
Step 3. Gathering Required Tools
You’ll need all of the necessary tools once you start wrapping your motorbike helmet. In many cases, you’ll be holding a loose flap or vinyl in one hand and need to use your heat gun to loosen it up so you can stretch it, then use your edger to smooth out any air bubbles. If you don’t have these tools when you need them, you risk messing up the entire project.
These working tools include screwdrivers, rubbing alcohol, lint-free cloth, soapy water, and a heat gun. It also includes an edging tool and a razor blade. You will need a bucket or frame if you decide to use the technique for wrapping the helmet with a single piece of vinyl.
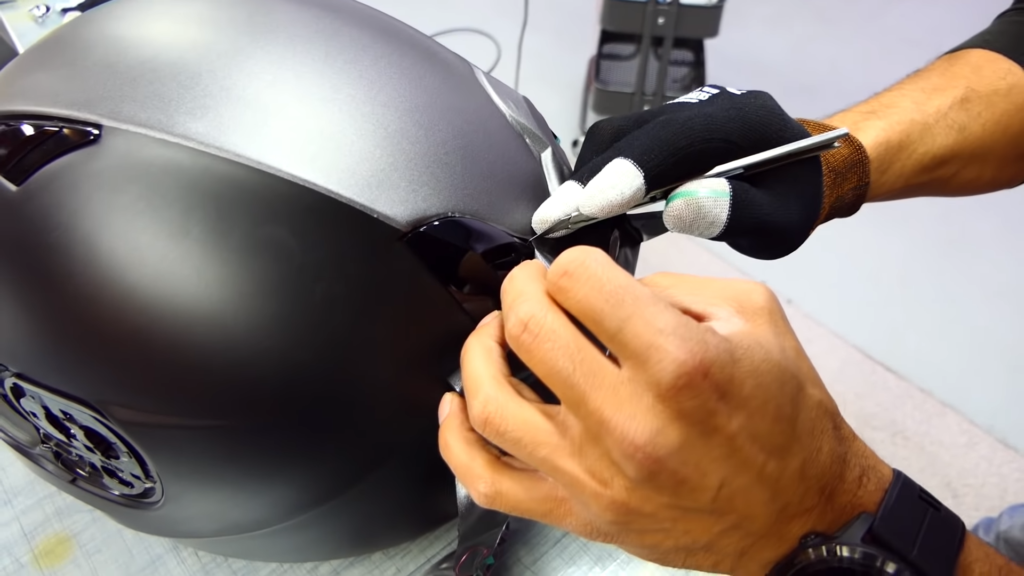
Step 4. Removing the Hardware and Filling Scratches
A motorcycle is rarely made up of a single unit. Before attempting to wrap your helmet, you need to remove any module such as vent covers and, more likely, the visors or other relatable hardware. Removing these objects will make your job easier than before, just as detaching the trim and the other outlet covers before painting a customized wall will make the process go faster and the result is cleaner.
The wrap you’re using on your motorbike helmet isn’t particularly thick, and it’s made to mold to your headgear’s curves. As a result, it will follow the shapes of any imperfections on the surface of the helmet. A scratch will be evident when the wrap adheres to the surface of the helmet. So fill in the scratches with plastic, fiberglass, etc.
Step 5. Clean the Helmet’s Surface and Make a Rough Cut of Vinyl
Clean the helmet properly using warm soapy water and scrub it with a brush. After scrubbing, finally wipe off again using a lint-free cloth and rubbing alcohol. Now cut the vinyl according to the shape you require for proper coverage giving you enough hold to stretch the heated vinyl. A clean and wiped helmet will allow proper binding of the wrap’s adhesive.
Cutting the vinyl into parts shouldn’t be an issue if you’re covering your helmet with solid colors. If you had a certain design or logo printed, be sure that it fits within a specific helmet section.
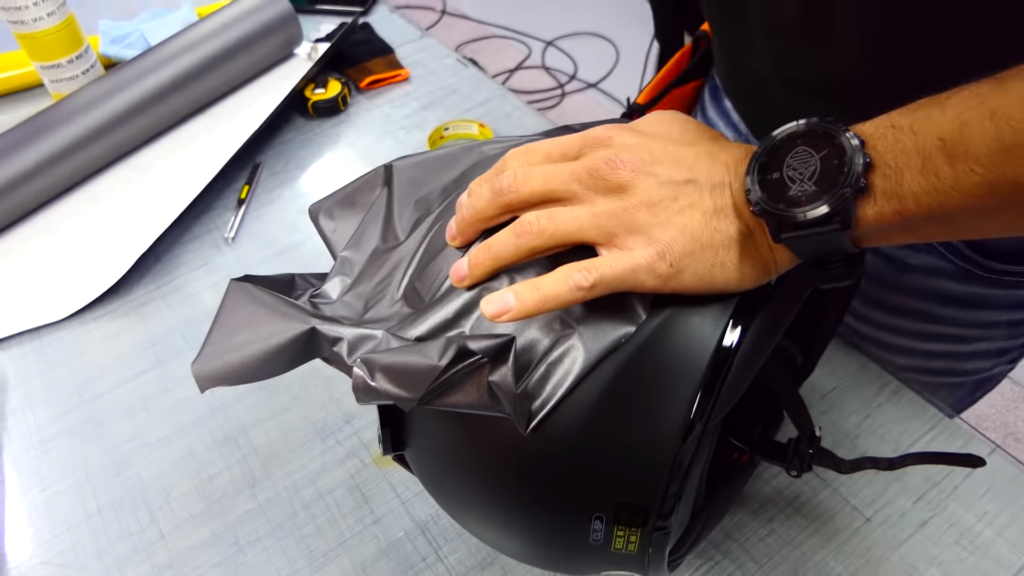
Step 6. Heat the Wrap, Stretch it, and Workout the Air Bubbles
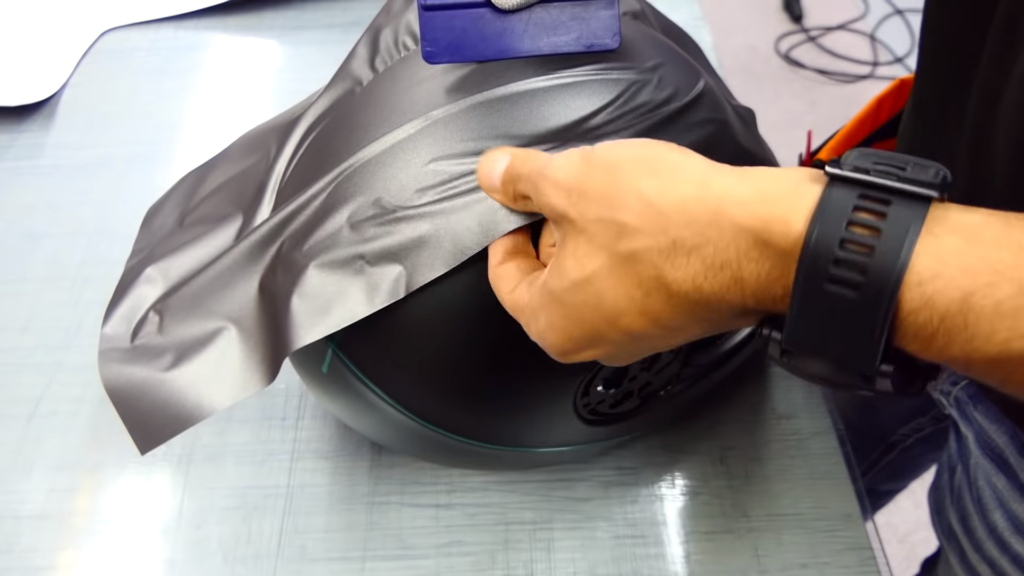
To wrap the helmet, peel the sticky protective backing of vinyl and work your way out from the center applying the vinyl wrap. The helmet’s surface is curved; therefore, you will need to heat the wrap to allow the wrap to stretch to fit in. A heat gun is an ideal option in this case. You can adjust the temperature according to your choice and can distribute the heat evenly by its blower.
When the vinyl is heated, you can pull it down and stretch it onto the helmet evenly. You’ll need to apply pressure to both activate the adhesive and push out any air bubbles as you apply newly heated vinyl portions out from the center of the section so that it’s adhered smoothly. For this, a flat, flexible edge is ideal.
Step 7. Secure and Trim the Edges
Excessive vinyl will be hanging beyond the edges, so you need to press firmly on the wrap to the edges of the section so that it does not stick to the rest of the helmet. If you used knifeless tape, you could pull the embedded thread through the vinyl to trim the edge.
If you haven`t ever used knifeless tape before, run a razor blade over the section’s boundaries. Be careful only to cut the wrap and not the helmet. And so finally, excess vinyl can be discarded.
Step 8. Heat the Seal and Reattach Hardware

Once the helmet is fully wrapped, heat seal the vinyl, ensuring that it does not break loose from recesses and curves on a very hot day. Set your heat gun to 80 to 90 degrees Celsius and evenly distribute the heat across the wrap’s surface.
It’s advisable to gradually increase the heat so that the temperature doesn’t rise too quickly. When the wrap cools down, you can reattach the visor and vents.
Types of Helmet that can be Wrapped
There are a variety of helmet wraps in the market. However, each one of them has its specifications. Shopping for such exciting accessories is always fun. While you enjoy taking a ride and race with your friends, you must also ensure your head’s safety.
As helmets are geared to offer your head and spine support while preventing injuries. There are a variety of helmet wraps that gets you confused about what to choose among them. Follow along. You`ll get the hang of it.
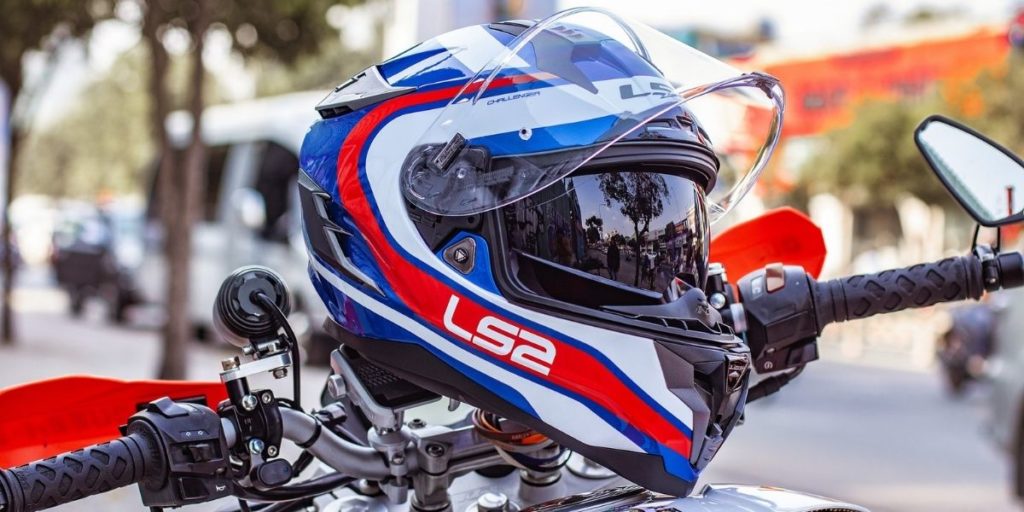
Full Face Helmet Wrap
With the quintessential outlook and precise dimensions, people usually take an interest in the full-face helmet. However, this shape is more likely to be used in racing expeditions and such other events.
Besides, as the name suggests, it covers the full face of the biker along with the head. Thus offering you utmost comfort in knowing that your head is safe from unprecedented and unexpected accidents.
The rider will see clearly through the transparent visor and from the opening at eye level. You can also customize this helmet around the chin area and wrap it according to the style you like the most.
Moreover, it is featured with aeration and ventilation for the fresh air to circulate inside for breathing and maintain the optimum temperature inside.
Modular helmets
A modular helmet resembles a lot like a full-face helmet. However, it has somewhat different features than the full-face helmet. Besides, it can be categorized due to the frontal chin opening. Along with that, you can open up the helmet`s chin-up area according to your convenience.
In addition, it is the most versatile and unique to its specifications. Meanwhile, you can use it for tourism and take it out for fun and adventurous rides. That being said, it is the perfect versatile companion for your highway rides also.
Furthermore, you can wrap it according to the outlook you want as you can also push back the chin area to your head if you want to breathe nature`s beauty.
Motocross Helmet
The motocross helmet is the top-rated and the most versatile helmet wrap in its nature. Meanwhile, with the sturdiness in the outlook, it does not have access to the visor as it lacks. Moreover, it is highly recommended for keeping the dirt away as it maintains hygiene and cleanliness.
Along with that, it can be paired with ergonomic goggles to add a little more safety for the eyes. Therefore, if you are a person with severe allergy issues, this is an ideal choice. Moreover, it has been geared to withhold a mouthpiece that will ensure the safety of your mouth and nose to prevent getting in contact with dirt and airborne viruses.
Besides, it has a large air vents that help in fresh air circulation and maintains the temperature by keeping the head cool. It is highly suitable for off-road places.
Dual-Sport Helmet
The dual-sport helmet is a hybrid styles helmet among the motocross and the full-face helmet. However, the shape is a bit likely as compared to the motocross helmet. Besides, it comes with an oval-shaped chin bar and ergonomically designed mouthguard with large air vents and a sun crowning at the topmost side.
Besides, it does offer improved isolation and the sound-proof system along with a retractable visor. With that being said, when a rider wants to snug out of the woods and hit the trail, heshe can always put on goggles for an extra durability.
Furthermore, the peak is said to be more durable and aerodynamic; therefore, it can be used to minimize the resistance while driving on a highway. Along with that, it has been specified with the pre-installed comm system; meanwhile, it also has an incorporated sun visor.
Three-quarter Helmet
Among many other versatile helmet wraps in our list, this here is very special to its modifications. In the hot summer season, when the temperature is raised above an optimum level, you can always have an option to choose what suits you the most.
For your ease, we have acquired the best and sturdily designed three-quarter helmet that you can easily detach the chin bar to turn into three quarter helmet from a full-face helmet.
With the utmost quality and wide variety, it offers the same level of safety and protection to your head and spine except for the face. You can always add a face mask to avoid dirt while wearing this ergonomic three-quarter helmet.
More this, with the advancement in designs and technology, such helmets are geared with closed air vents. In addition, they also have classic silhouettes that keep the rider`s temperature cool and calm.
Hence, it is great for the people who ride a scooter and for the cruisers who love to ride in an urban area. However, lack of face protection could become a hassle with this one.
FAQ
Is motorbike helmet wrapping expensive?
It depends on the quality and type of the material of wrapping. Secondly, it also depends on the installer, but the overall wrapping of a motorbike helmet is expensive if you are not doing it yourself. Wrapping a helmet at home is less expensive.
Can we wrap a helmet at home?
By following some basic steps, you can also learn to wrap at home, like first, you have to choose the material for wrapping and some necessary tools. But it depends on your skills and the shape of a helmet.
Which material is suitable for wrapping?
Most people prefer vinyl for wrapping because it is very easy to apply. This material is not too thick and hard. Fiberglass is also used. These materials protect the surface of the helmet.
Is wrapping a helmet a long process?
The most time taking part of wrapping is graphics. After that, it depends on the shape and size of the helmet.
Is wrapping long-lasting?
It will last for almost 8 to 10 years, but this also depends on the material quality and if proper installation is done.
Final verdict
Wrapping a motorbike at home is one of the best choices because it is inexpensive, and you will be able to learn how to wrap a motorbike helmet at a very low price. The second benefit of wrapping at home is that you will able to wrap a helmet according to your desire and need.
Choose the wrapping material wisely if you are planning to do a wrap at home. If you want a perfect wrap on a helmet, then do not do it yourself at home. It is better to provide all materials to the installer and guide him about your choice. This will be more easy but costly.
However, in the end, it will be long-lasting. Moreover, the installer will do the graphics properly as you directed. Polyvinyl is a suitable wrapping material. The wrapping depends on the type of material and the shape of your helmet.